Welcome to
BEGINNER’S BOTANICAL DRAWING: A GUIDE TO POISONOUS PLANTS
with Solstice Handmade
Materials:
Watercolor Paper
Tombow Dual Tip Pen
Pencil and Eraser
Coloring supplies (optional) watercolor, colored pencil, crayons
TECHNIQUE WARM UP: GETTING COMFORTABLE WITH NEW TOOLS
BRUSH PEN: LINE WEIGHT
We will practice a series of drills to explore the Brush Pen’s capabilities.
-Thin and Thick: Draw a series of lines as wide as you can, using the side of the brush as you drag the pen across the paper. Then, draw a series of lines as thin as you can, focusing on the tip of your pen.
-Tapered Lines: Draw 10 1in long line, starting by pushing the brush hard against the paper for a wide line, and releasing pressure as you move across the page. This difference in thickness of line is referred to as line weight. Next, Draw 5 (about) 8in tapered lines that span the width of your paper. Think about smooth transitions-can you spread out the change in width gradually and evenly?
-Circles - Draw 10 1in circles on your page. Push hard on the downstroke for a wide line, then lighten pressure for a thin line as you come around upwards to complete circle. Focus on consistency- can you make all of your circles identical?
PENCIL: OUTLINING
Pencil will give us structure to our drawings. We want to use pencil as minimally as possible. Do NOT gauge the paper by pushing down hard while you draw- make as light of marks as possible. Just skim the paper’s surface with the graphite.
Draw 2 rows of 5 1/2in circles. Use a penny or dime as a stencil if you have one handy! Label the circles with the percentages seen in the photo-
FINE TIP PEN: BUILDING VALUE WITH MARKMAKING
Our Fine Tip pen will be used for adding detail, value, and fine marks. Value is created by building up small lines and dots, known as hatching and stippling.
-Stippling uses a series of small dots at different densities to create a textured, speckled, scale of light/dark. Try to keep your dots evenly places- and don’t slam the pen! Just tap lightly to preserve the fine tip.
-Hatching uses a series of fine parallel line to create
STUDY THE SUBJECT: PLANT PHYSIOLOGY BASICS
I have found drawing an important way to study plants and get to know them on an intimate level. Studying what you are drawing and taking time to know and understand the parts of a plant is very helpful in portraying it accurately and effectively. Getting familiar with the terms and features of plants is also very useful in identifying species. Below you will find diagrams detailing leaf shape, structure, and exterior physiology, as well as flower physiology.
It is also important to consider where the plant is in it’s life cycle- sprouting? flowering? fruiting? The same plant can look vastly different depending on the time of year. Take the fruit bearing plants below for example- it’s important to consider what stage flowers/fruit are in.
LEARN FROM THE MASTERS: EXAMPLES FROM ART HISTORY
The challenge of drawing with pen and ink is capturing not only detail, but value. Using only black ink and white paper in our drawing is vastly different from drawing with mediums that allow greyscale value transitions, like graphite or paint. Every mark you make is there or not, black or white, like a 0 or 1 on a computer - how does that translate to light and shadow? We practiced density of mark during our warm up… but how does that apply to plants?
Otto Brunfels, 1530
John Farleigh, 1929
Etchings and Engravings are limited similarly to ink drawings, as they were usually made purely with black and white line and shape. Below are examples from Art History that utilize line in a strong and successful way.
Pay close attention to where these artists choose to use solid blacks and whites.
Note the way that their detailing and value lines, within leaves and petals, curve to fit the shape of that leaf or petal. This choice helps to give our eyes hints- where is a plant part flat, rounded, curly, square, folded? These lines are called contour lines.
APPLYING TECHNIQUE: DRAWING FROM LIFE
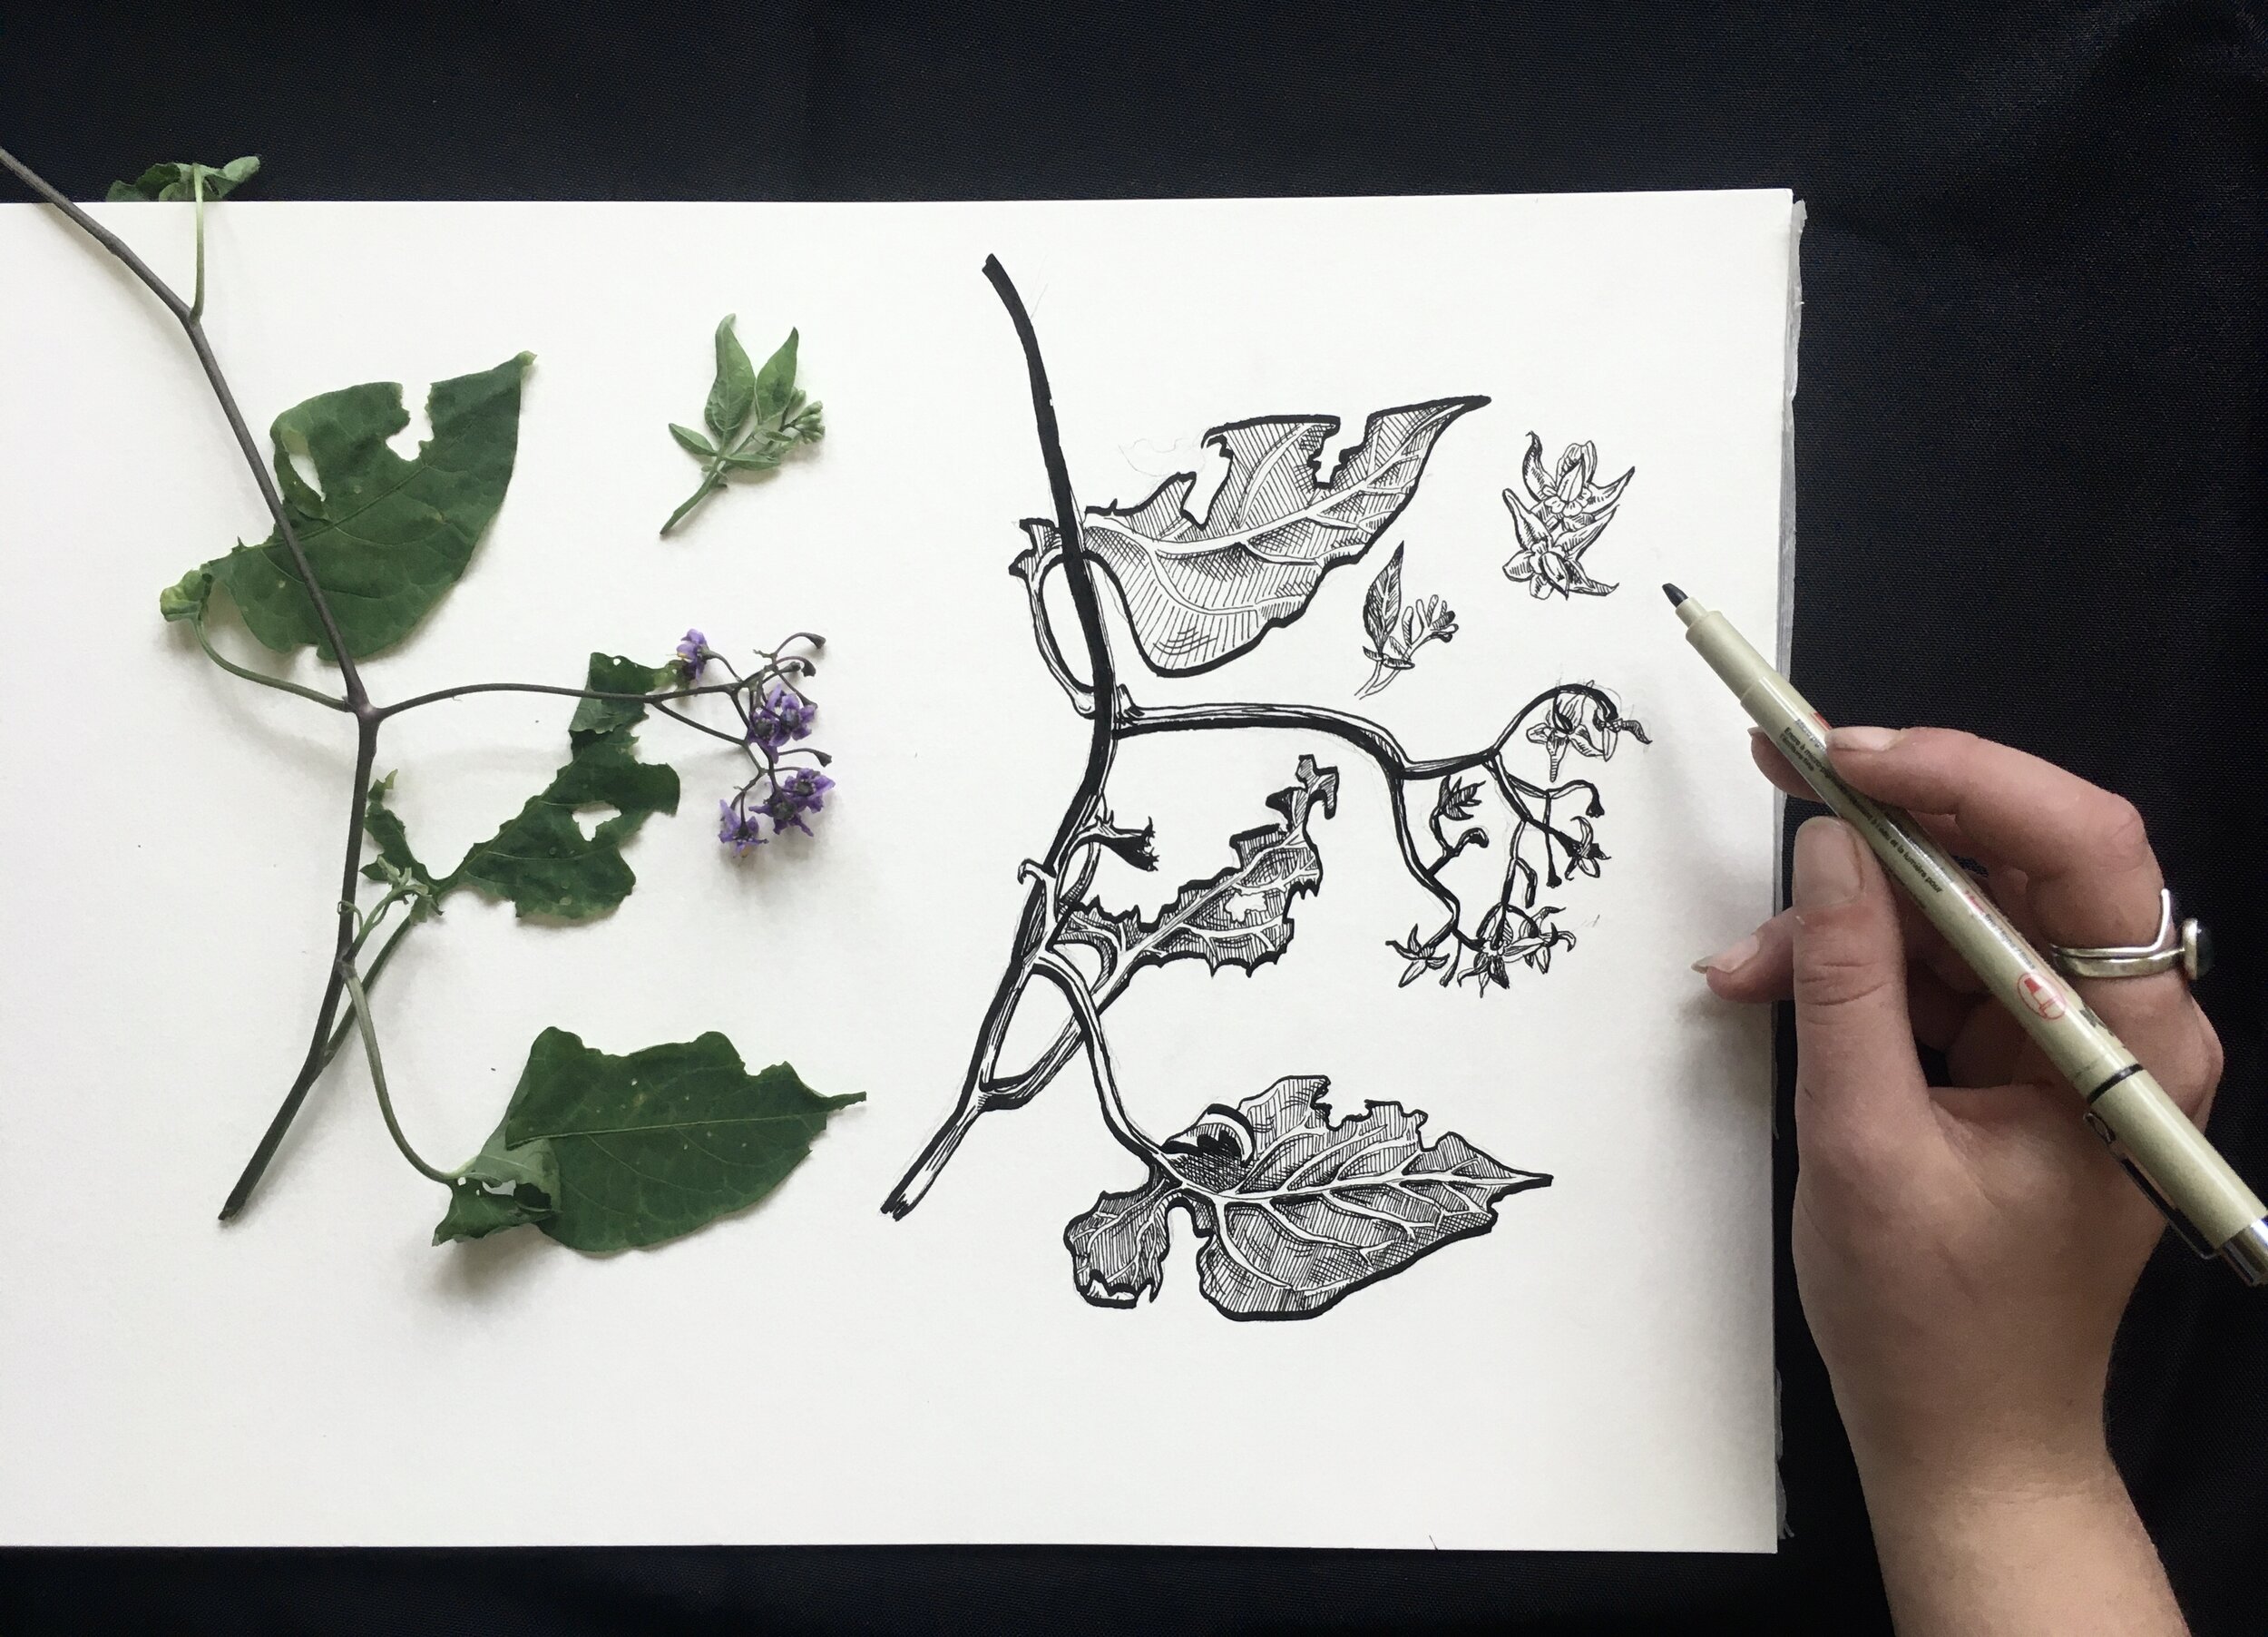
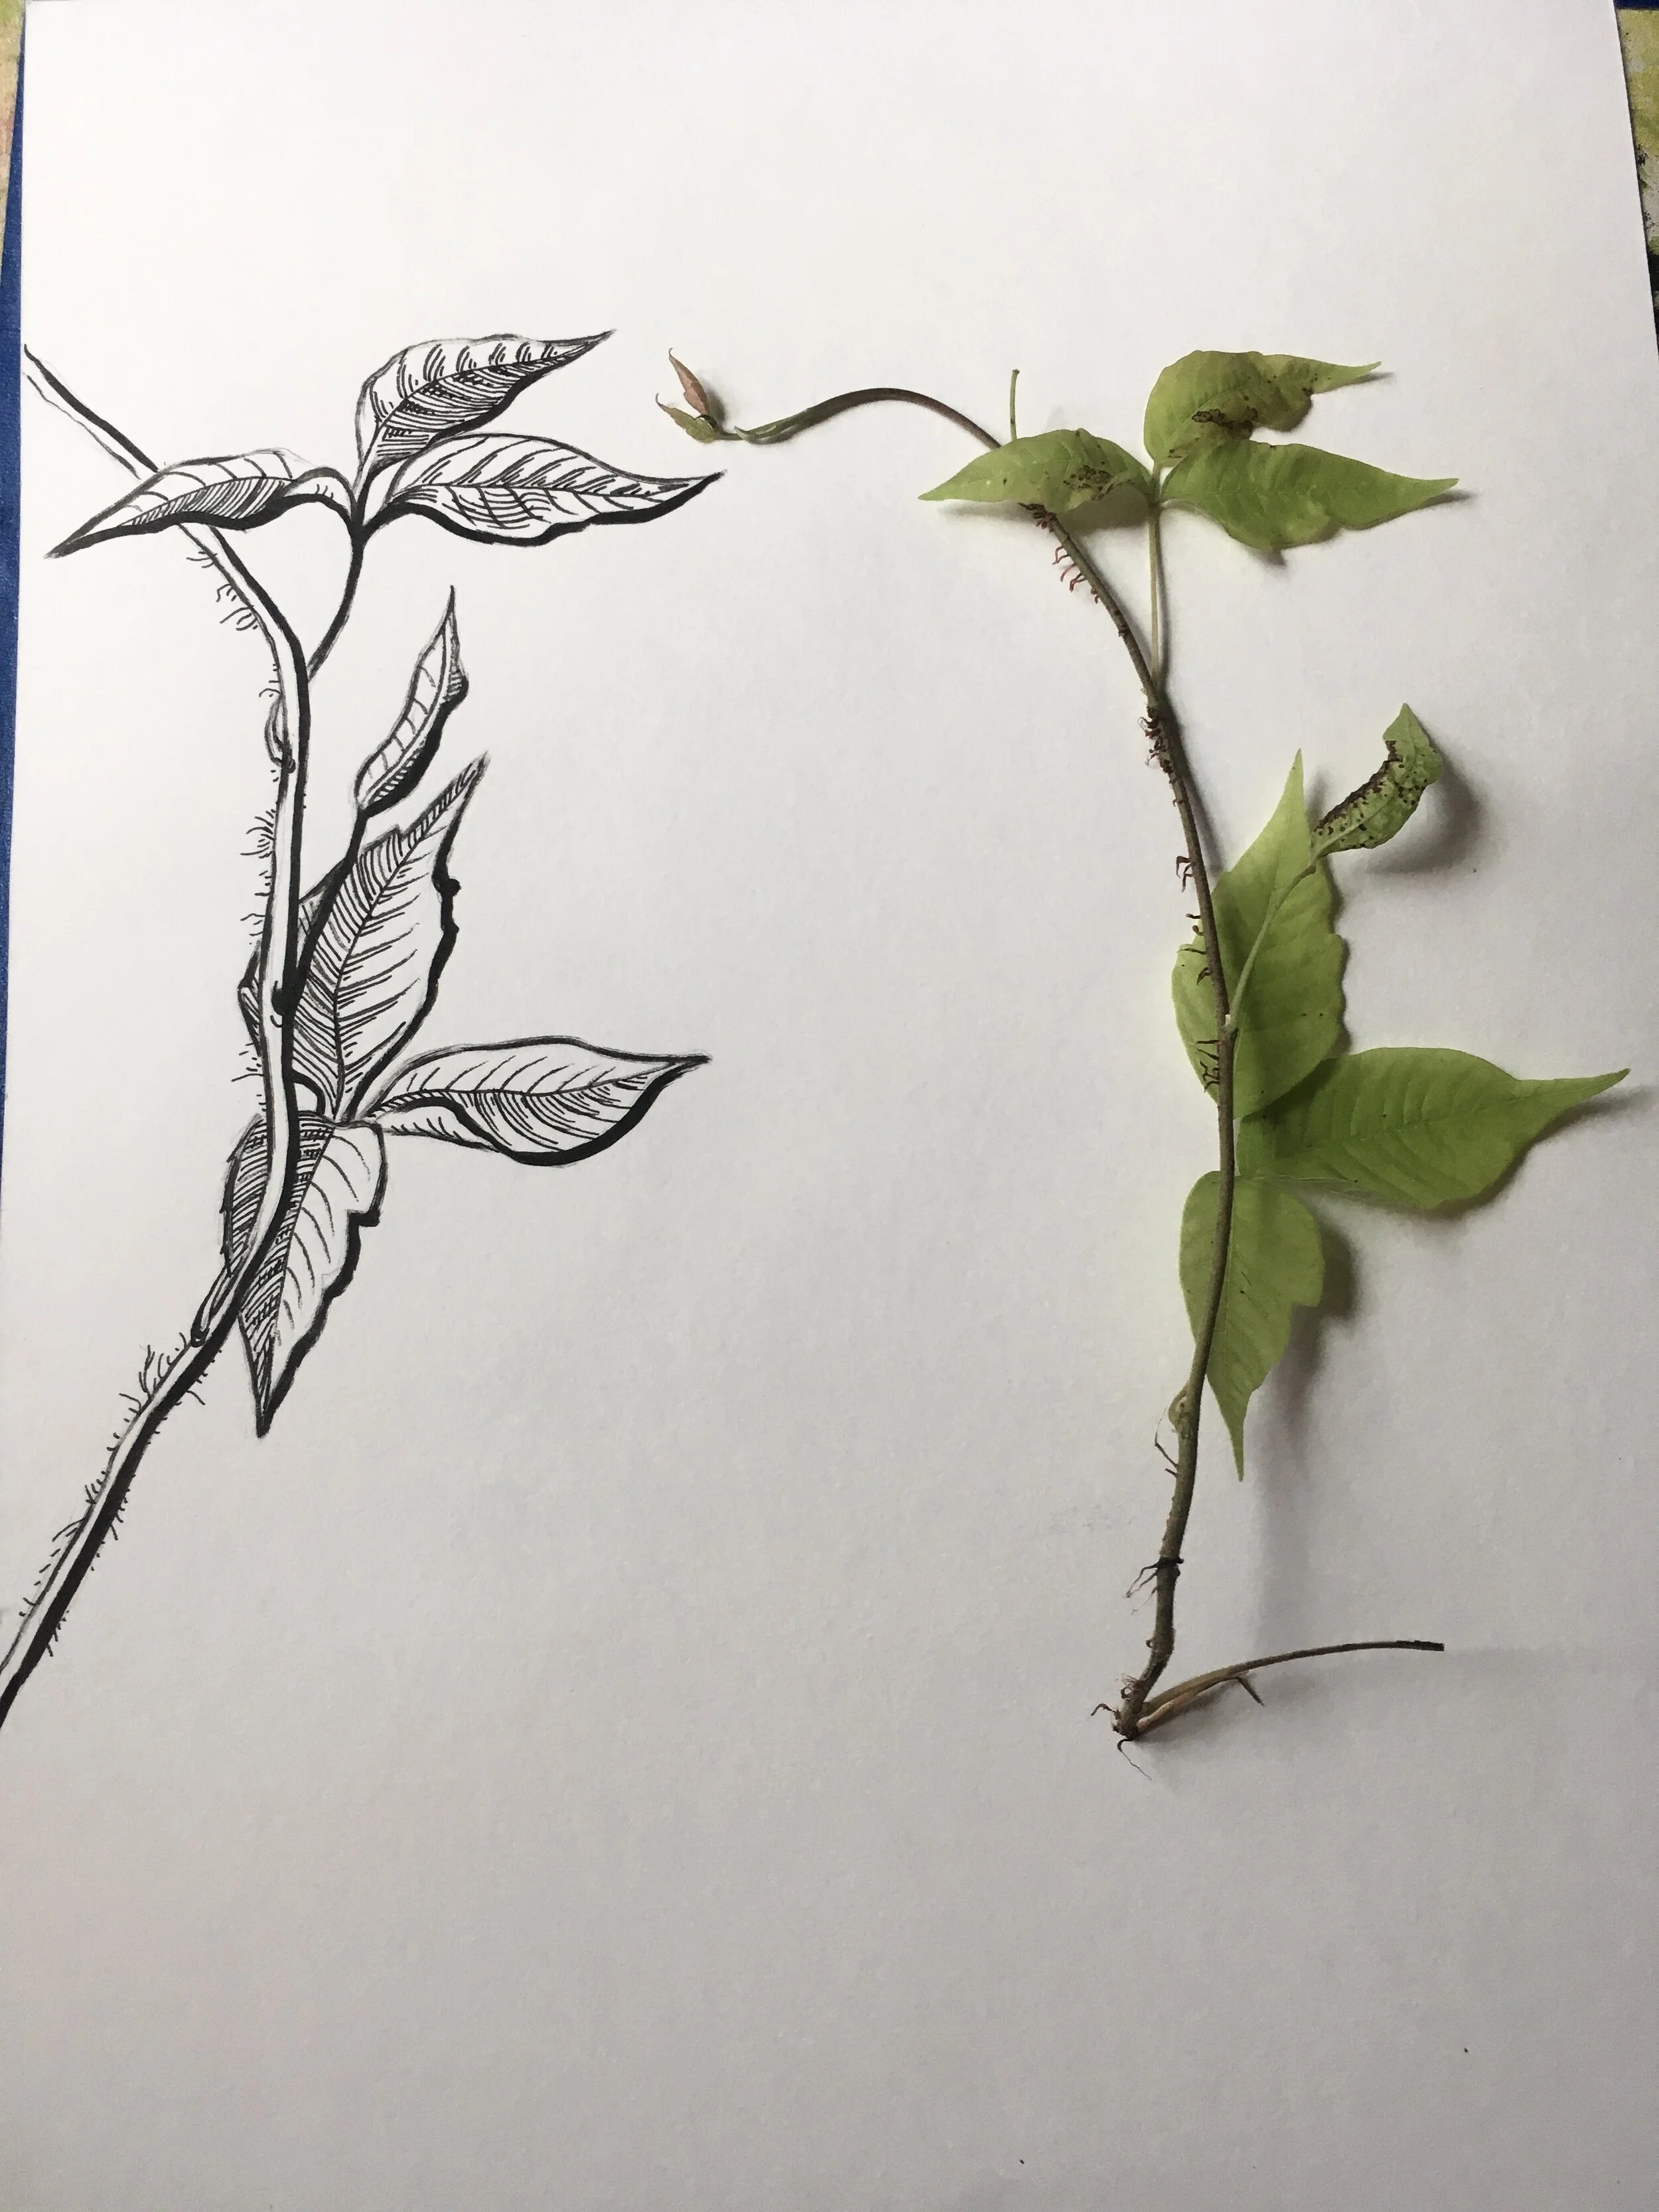
I encourage you to draw from actual plant specimens as often as possible! Today we will use some collected plants, and some photos, to tackle a few species that I do not currently have access to, and as we can’t meet in person, you’ll be seeing this on a screen either way.
My method of drawing is quick, great for field sketching! Our goal is to capture identifying characteristics and imply a light source.
PENCIL OUTLINE: JUST THE BASICS
Look back at the plant physiology diagrams above before you draw! We are only capturing the edges of the shapes we are seeing here. Don’t add any detailing or value yet - light outline only
What leaf shape and structure are you seeing?
Does this plant have fruit? flowers? Where is it in it’s growth?
Start by drawing general shapes of leaves and flowers - it’s ok to draw ugly at first! Gradually refine drawing, referring to photo to check angles of leaves and petals, as well as proportions
INK OUTLINE: BRUSH PEN
Focus on line weight here.
Where are there shadows present? Where is the light coming from?
On the light side of the object, use fine lines. On the shadow size, use heavy, thick line weight.
Where are the most extreme values- lightest lights and darkest darks? Make a note, mental or sketched, to leave these areas completely white or fill in completely black.
ADD VALUE AND DETAILING: FINE TIP PEN
Here is where our markmaking comes in to play! depending on the texture of the surface you’re trying to draw, use stippling and hatching to add detail and value.
Ask yourself- what surface details are significant to identifying the plant? Striping, patterning, hairs, ect. Draw these first!
Next, start adding value with markmaking. Look at photo often, and pay attention to the line weight you have drawn so far. Stay consistent!
Where you use hatching, pay attention to the shape of the leaf/petal/part that you’re working with. Curve your lines to fit the shape- but keep them parallel!
In general, objects farther away from you have less detail and contrast. This means if there is a leaf behind the stem, or a petal on the back of the flower, anything that’s not in the foreground should be drawn differently to establish depth. I like to fill in these shapes with a 50% hatching and omit most textural details. This helps your eye focus on the foreground detail.
ADD COLOR: OPTIONAL
Watercolor
paint light-handed- don’t scrub the paper of the ink will likely bleed
use a pale color (lots of water, little paint) so you can still see your linework
consider painting after the pencil sketch step, and inking on top of paint
Colored Pencil
again- don’t press too hard, the wax and color will obscure your ink lines!
DONT do colored pencil first and attempt to ink over top- the pencil will not allow the ink to settle on the paper
Marker
Work in layers- go over an area quickly, let it dry, then add more in necessary to avoid smudging your linework!
consider adding colored linework instead of just filling in the space- where can you make the color darker to match the lighting of your drawing?
Planning a Full Page Composition
Sketch first! Plan the layout with pencil, even if it’s rough.
Mark where your title will go first to be sure you allow space.
Be conscious not only of each individual plant drawing, but how the look together.
Consider spacing and scale. How busy do you want the page to be? How many plants are you trying to include? Are plants at an appropriate scale to each other?
Consider the overall value distribution. Where are you darkest darks? Are they spread out, or clustered in one area?
You don’t have to be a lettering expert to make a great diagram- write with pencil first and check you spelling, but I encourage you to let your own hand shine. Wobbly as it may be, its a reminder that a human being made those letters!
Here’s another example from:
We love the way she fills the page with plants packed together- but not quite overlapping. The spacing is even, the darks and lights spread out over the page, and the drawings are complimented by hand written text.
WHAT NOW? : RESOURCES AND IDEAS
Learn more about Plant Identification:
Learn more about Botanical Drawing:
Michigan Poisonous Plants Resources:
Don’t Pick Poison! MUSHROOMS (Midwest American Mycological Information)
Dangerous Plants (Michigan Gardener)
Poisonous Plants Treatments
What to do if You Touch, Eat, or Burn a Harmful Plant ( University of Vermont)
Poison Ivy Treatment (Mayo Clinic)
Poisonous Plants Stories


